Arduino zig: blink
blink is like hello world on Arduino, and here I will show how to do it in zig. First, you need to create a zig project:
mkdir zig-arduino && cd zig-arduino
zig init-exe
1. Blink(programming)
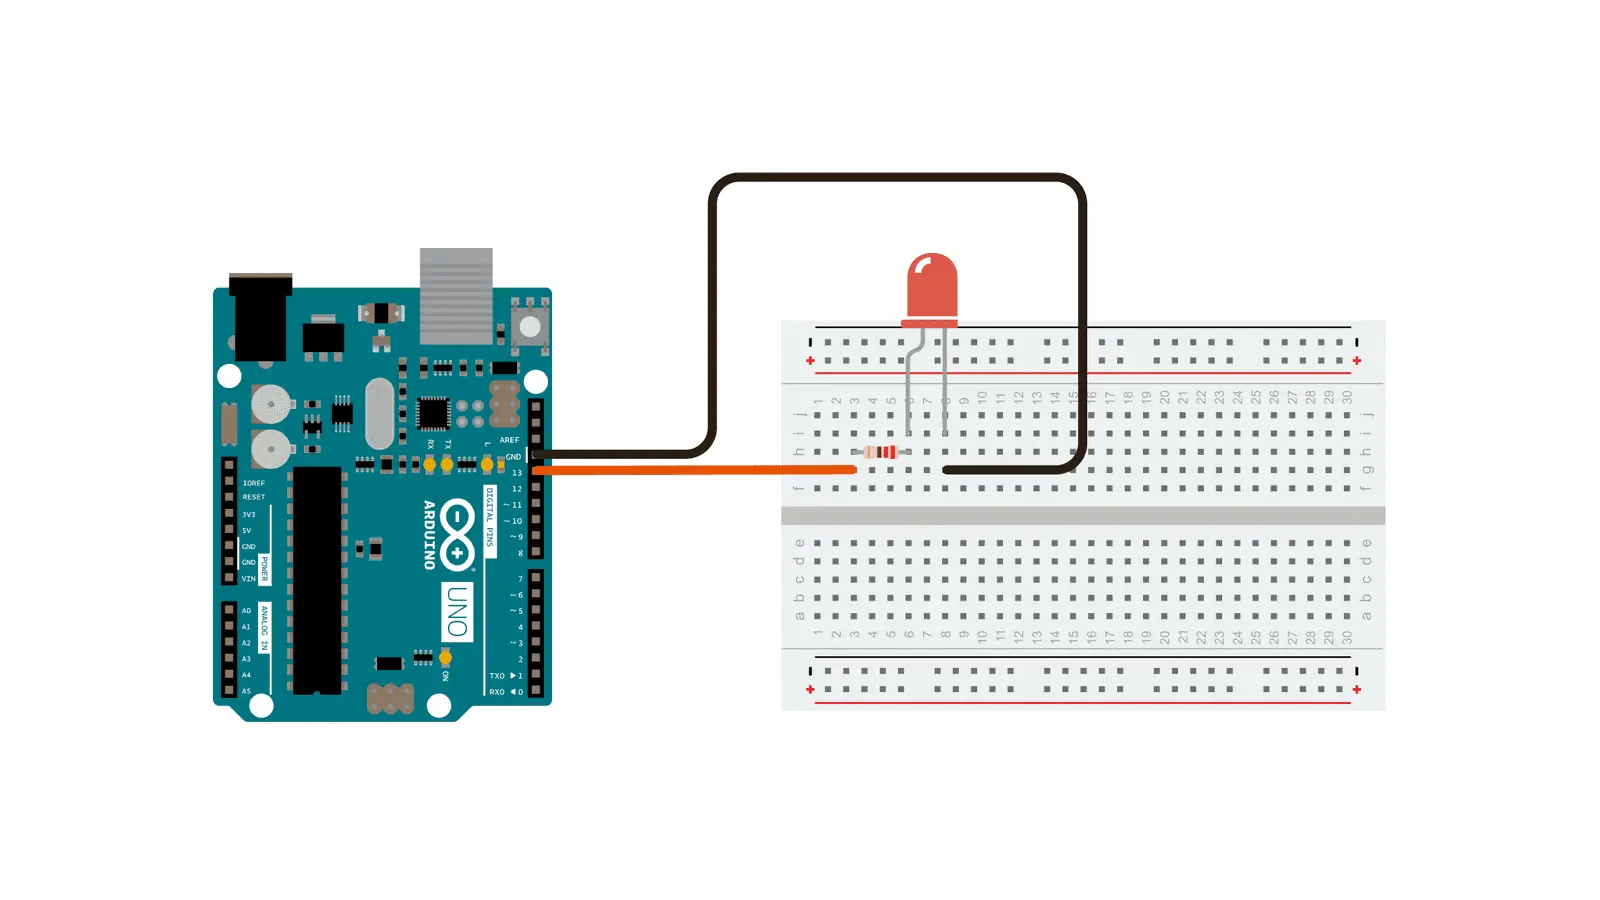
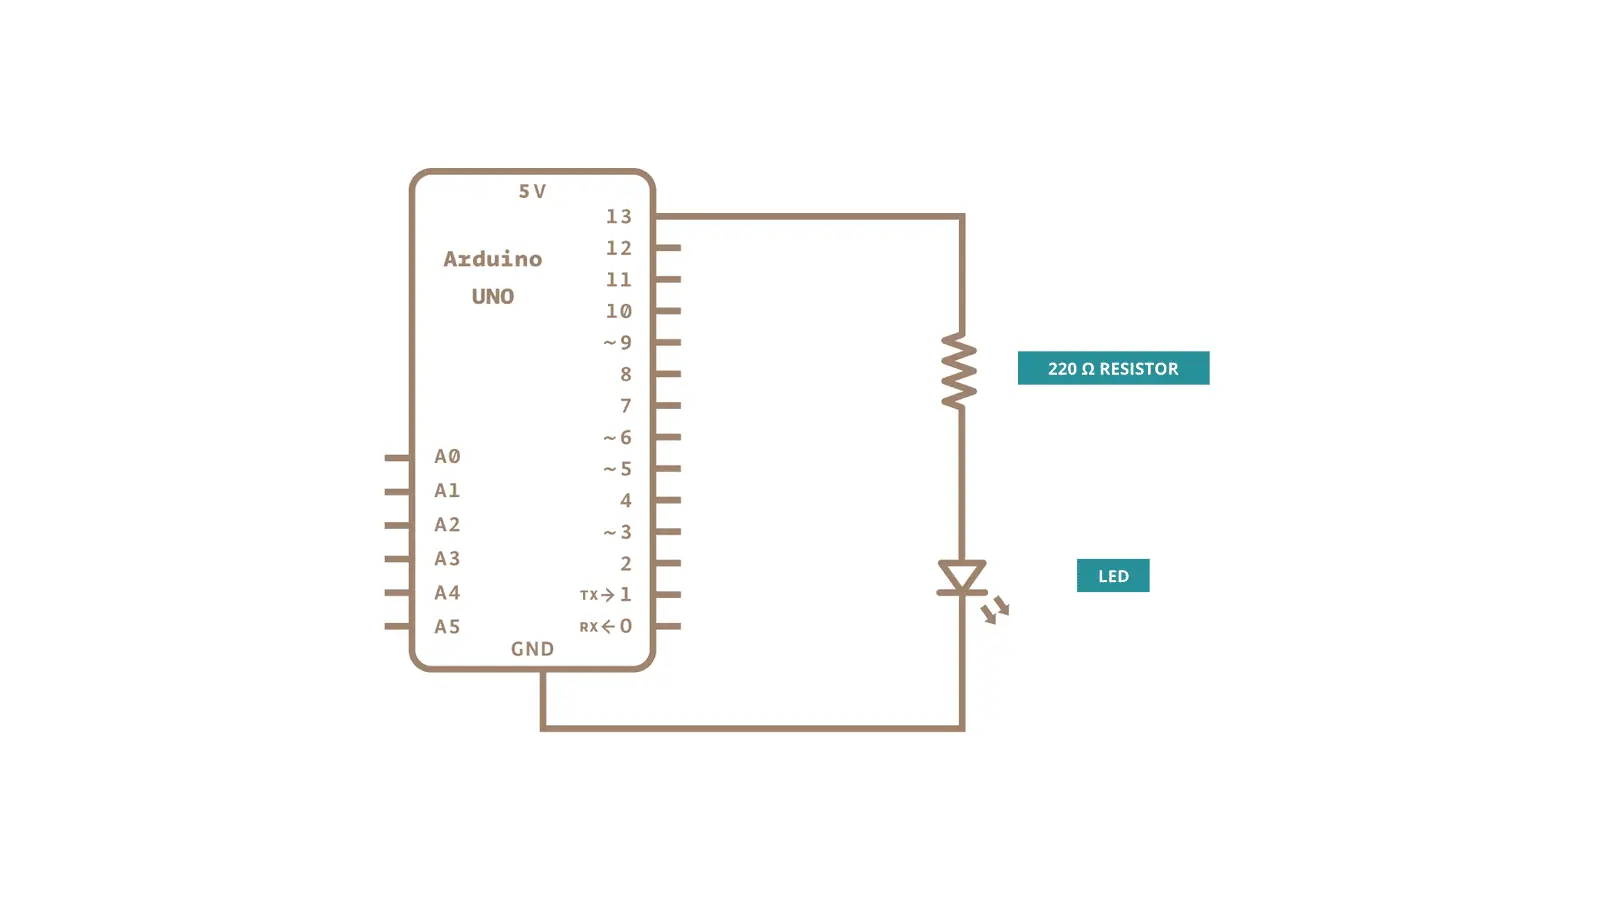
You can look the following picture from Arduino Examples to figure out how to build these handcrafts.
Now, you can start programming(in src/main.zig). First, import
arduino and arduino.gpio:
const arduino = @import("arduino");
const gpio = arduino.gpio;
@import("arduino") is special since it's not import a local package,
but a global one, this need to be setup in build.zig, you can learn
this in setup section. A side effect code is
required:
pub const panic = arduino.start.panicHang;
Finally, came to main function. Idea is simple:
- initialize LED(13) as output pin
- loop
- turn on LED(set LED pin to high)
- delay 500ms
- turn off(set LED pin to low)
- delay 500ms
const LED: u8 = 13;

pub fn main() void {
    gpio.setMode(LED, .output);

    while (true) {
        gpio.setPin(LED, .high);
        arduino.cpu.delayMilliseconds(500);
        gpio.setPin(LED, .low);
        arduino.cpu.delayMilliseconds(500);
    }
}
All code is here:
const arduino = @import("arduino");
const gpio = arduino.gpio;

// Necessary, and has the side effect of pulling in the needed _start method
pub const panic = arduino.start.panicHang;

const LED: u8 = 13;

pub fn main() void {
    gpio.setMode(LED, .output);

    while (true) {
        gpio.setPin(LED, .high);
        arduino.cpu.delayMilliseconds(500);
        gpio.setPin(LED, .low);
        arduino.cpu.delayMilliseconds(500);
    }
}
2. Zig project setup
zig init-exe
zigmod init
zigmodis a package manager for zig, you might need to install it first. I recommended you just install it from source.
Now, you should have a tree
.
├── README.md
├── build.zig
├── src
│   └── main.zig
└── zig.mod
Add the line - src: git https://github.com/dannypsnl/avr-arduino-zig
after dev_dependencies: in zig.mod. Example:
id: <your id>
name: <your project name>
license: <your license>
description: <your description>
dev_dependencies:
- src: git https://github.com/dannypsnl/avr-arduino-zig
Then you run zigmod fetch, the command creates deps.zig in the
current directory, where deps.addAllTo(exe) will let
@import("arduino") work. Now, you are able to modify build.zig to
fit this project!
pub fn build(b: *std.build.Builder) !void {
    const uno = std.zig.CrossTarget{
        .cpu_arch = .avr,
        .cpu_model = .{ .explicit = &std.Target.avr.cpu.atmega328p },
        .os_tag = .freestanding,
        .abi = .none,
    };

    const exe = b.addExecutable("blink", "main.zig");
    deps.addAllTo(exe);
    exe.setTarget(uno);
    exe.setBuildMode(.ReleaseSmall);
    exe.bundle_compiler_rt = false;
    exe.setLinkerScriptPath(.{ .path = deps.dirs._ie76bs50j4tl ++ "/src/linker.ld" });
    exe.install();
    // ...
}
This is enough to get zig-out/bin/blink after run zig build. You can
run command like
avrdude -carduino -patmega328p -D -P /dev/<your device> -Uflash:w:./zig-out/bin/blink:e
to upload binary and see result, so the following section is optional.
2.1. Custom command in build.zig
pub fn build(b: *std.build.Builder) !void {
    // ...
    const tty = b.option(
        []const u8,
        "tty",
        "Specify the port to which the Arduino is connected (defaults to /dev/ttyACM0)",
    ) orelse "/dev/ttyACM0";

    const bin_path = b.getInstallPath(exe.install_step.?.dest_dir, exe.out_filename);
    const flash = blk: {
        var tmp = std.ArrayList(u8).init(b.allocator);
        try tmp.appendSlice("-Uflash:w:");
        try tmp.appendSlice(bin_path);
        try tmp.appendSlice(":e");
        break :blk tmp.toOwnedSlice();
    };
    const avrdude = b.addSystemCommand(&.{
        "avrdude",
        "-carduino",
        "-patmega328p",
        "-D",
        "-P",
        tty,
        flash,
    });
    const upload = b.step("upload", "Upload the code to an Arduino device using avrdude");
    upload.dependOn(&avrdude.step);
    avrdude.step.dependOn(&exe.install_step.?.step);
}
The point is addSystemCommand, which allowed you to add arbitrary
command into build script! flash is unfortunately, but we always need
allocator for a runtime string.